This is the 2nd year I've taught Geometry. Last year I taught Honor's Geometry, so those students were
EXTREMELY intelligent and got things pretty quickly. This year I had a mix of high and low kids, so it was a little bit of a challenge for me. I used a lot of the same things I did last year, and it worked well for the most part. There are some things I wish I would have taken more time with, especially in the beginning. Geometry is picky...if things are labeled correctly, it can change the entire picture. When we first start geometry, we go over all of the basic definitions in detail. We do Frayer model definitions for all of the basic terms and talk about what each of them are. Next year, I need to take more time doing this to really make sure they understand and can label/draw things appropriately. I found out in 2nd quarter that we still couldn't label a ray correctly, and that's kind of a problem.
Basic Geometry Definitions
This lesson takes a little bit of time just because it's a lot of writing and cutting out/gluing. However, I think it's good to talk about what each term is and show them examples and non-examples of what we're talking about. Next year, I plan on taking a little more time with actually drawing/labeling things so they can learn to do it right at the beginning.
The next lesson we did was about distance and midpoint. I gave students the formulas to write in their notebooks and we did an activity to practice. For the activity, I made a copy of the school map and drew a coordinate plane on it. I had students map out their schedules for the day. They then had to find the distance and midpoints between each of their classes during the day. We acted like birds and "flew" over the walls so we didn't have to worry about going through walls and all that. This project took a couple of days, but they got a lot of practice with the distance and midpoint formulas. One thing I learned from doing this is that my kids didn't remember that squaring a negative number results in a positive number, so I had some issues with the distance formula. Overall, I think this was a good activity.
Distance and Midpoint
(This is not the best pic of the map, but you get the idea. I put a point in each room for them to use as reference for that room. So my room has a point of (-1,7).) You can find a copy of the map project outline
here.
I wish I would have taken pics of what the students' work looked like. They did a good job with this and really took their time on it.
Our next lesson was over basic angle relationships, another integral part of geometry. First, we defined what angles are and how they are made, which seems pretty obvious knowledge but you would be surprised. We then talked about how to name angles, which you can see in this foldable.
Angles and Angle Relationships
Next, we defined the basic angle relationships: angle bisector, congruent angles, right angles, acute/obtuse angles, vertical angles, complimentary angles, supplementary angles, adjacent
angles, linear pair, and perpendicular angles. The first sheet is
something I made. The second is a foldable I found for free on Teachers
Pay Teachers
here. It worked for what I needed it to. I think next year I'll tweak it a little and add linear pair and perpendicular angles to it just so everything fits in one foldable. Since there are so many different angle relationships, I broke this into a 2-day lesson.
We then practiced naming different types of angles from a PowerPoint I made. It just has a pic of an angle relationship and they told me what kind of relationship it was. You can do this several different ways...4 corners activity, white board activity, SMART response, quiz, whatever you like really.
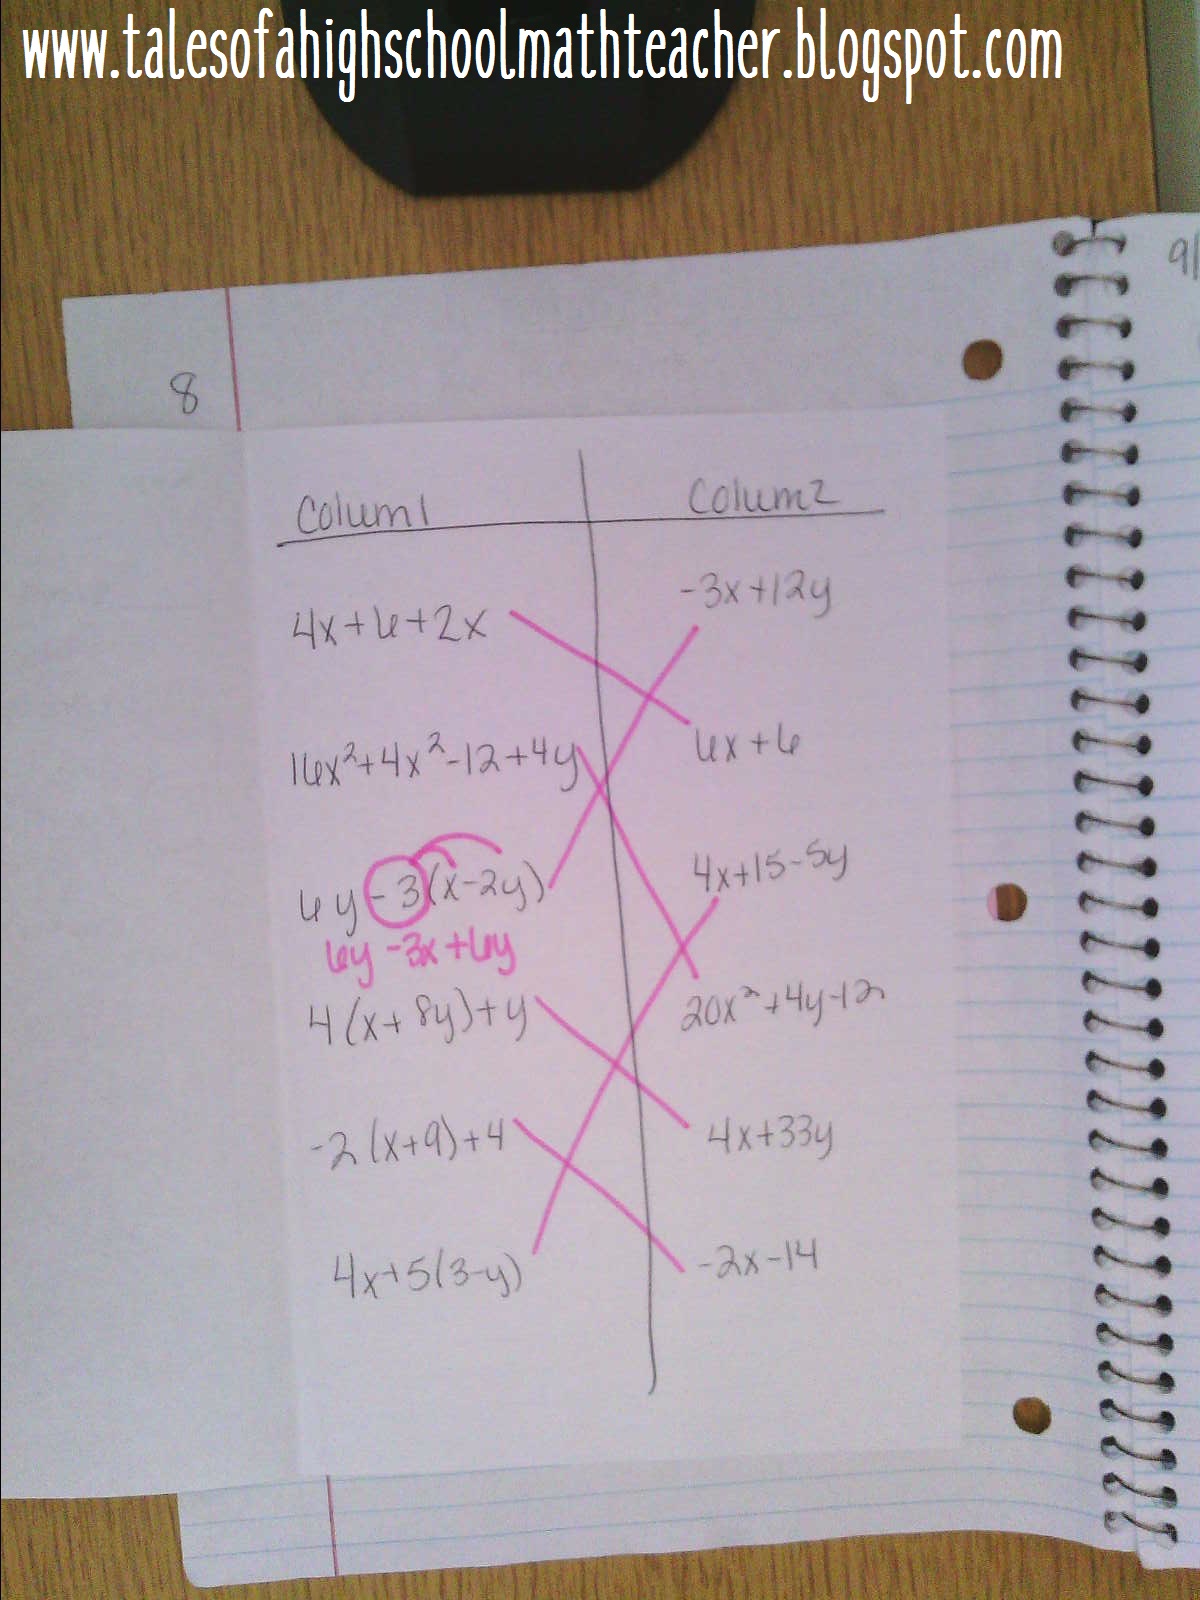
The last basic geometry lesson we did was over 2-D and 3-D shapes. They learn about this in middle school, but as I've learned you can't ever assume they remember it. We went over the formulas for the 2-D shapes and practiced using them.
2-D and 3-D Shapes
(The one I gave students is blank. They had to fill in all of this information. Here's a copy of them both:
blank,
filled in.)
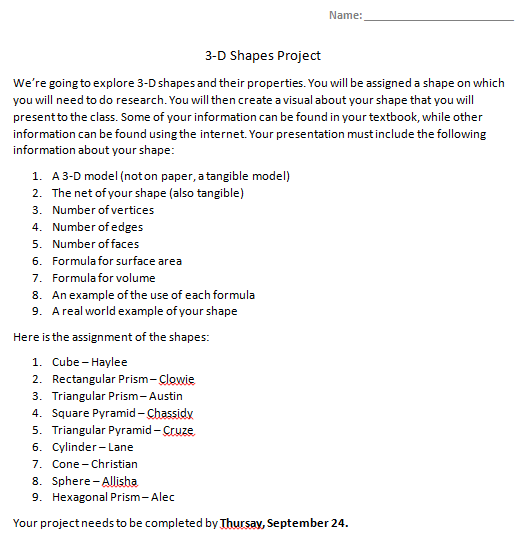
For 3-D shapes, I decided to do a little more than just give them the formulas and we practice and move on. I like doing projects, so I figured why not do one for this? I assigned each student a 3-D shape and had them present the following: the net, the shape, the number of edges and vertices, the volume formula, the surface area formula, and examples of how to use each.
Here's a
link to the project.
Since the net and shape had to be tangible, I made a mobile out of them and hung them in my room. Next year, I'm going to make this a requirement when presenting their project. While they presented, the rest of the students were given this sheet and had to copy down the information being presented to them.
Here's the
link to this page.
Here are the mobiles that I made from their work.
I liked this project a lot, but it took a little too much time to do. It will definitely be like a 2-day project next year. I'm also going to require them to get their information approved before presenting. Thankfully it only happened once, but one of the formulas presented was wrong which caused some issues but nothing too major.
If this is the first time you're visiting my blog and you're curious as to how my notebooks work, follow the links below and you can see how my notebooks are set up!
ISN Set-Ups 2015-2016
ISN Set-Ups
I hope you find some use in your classes from these ideas. Feel free to leave comments about how these lessons went for you or if you have any suggestions I'd love to hear them. Happy teaching!


.jpg)
